Calibrated Mass Flow Leak Testing
There are times when calculating flow is a better option than traditional mass flow leak testing. These times might include when you want to shorten the test cycle time, or when you have parts that have inherent flow characteristics—like porosity, filter material, or other materials that might absorb pressure—but you want to test beyond the inherent characteristics.
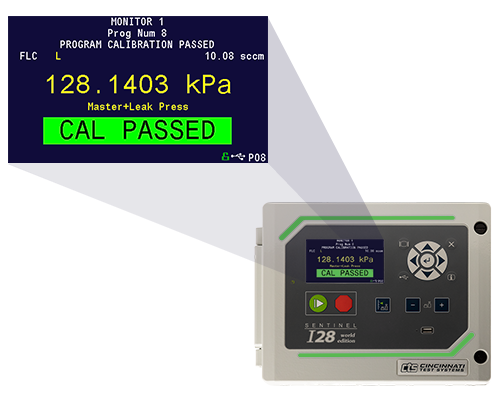
Because of this, Cincinnati Test Systems offers a calibrated mass flow leak test, which calibrates to the characteristics of the products to shorten cycle times. Also known as linear offset or mass flow offset, calibrated mass flow leak testing involves a mass flow calibration, where a test is conducted on a non-leaking part to identify the point where a flow measurement is at zero.
In a calibrated mass flow leak test, the test is calibrated to the inherent flow measurements of a non-leaking part from its normal expansion characteristics.

How to Calibrate a Mass Flow Instrument
To calibrate a mass flow instrument, a two-point calibration method is conducted.
- During the first calibration measurement, a master non-leaking part is identified. The instrument then measures the inherent flow characteristics due to expansion and thermal conditions affecting the measurement. This value is the “Master Part Flow.”
- During the second calibration measurement, the same master non-leaking part is tested to the same test pressure and timers with a leak standard introduced into the circuit.
From the calibration measurements, the instrument calculates the leak flow and identifies the correlated leak standard flow. The flow offset is the difference between these calculated settings (inherent flow characteristic of the master part in the example this is 0.07 sccm).
As in mass flow leak testing, the part to be tested is pressurized and held for an amount of time to stabilize the flow. As pressure becomes more stable, the flow rate being measured also stabilizes closer to zero, reflecting the actual flow rate of the part.
When a mass flow system is not calibrated to a leak standard, the instrument uses the factory calibration measurements of the flow meter. This type of mass flow test has the flexibility to set a cycle time to measure the largest volume part of a family of parts. Then, when a changeover occurs, the test cycle may test smaller volume parts with the same test cycle.
Once a system calibration is set, the flexibility of testing different size parts is lost. To test other parts, or if there is a change in the process or test time, the system must be recalibrated. The Sentinel I28 will store the calibration data of up to 99 different parts, while the Sentinel MH and LPC 528 will store up to 32 different parts. These parameters can be a mix of factory-calibrated sequences and uncalibrated sequences.
The benefit of calibrating a mass flow test is that it can test smaller volume parts in less time, allowing shorter test cycle times. A master non-leaking part is required to calibrate or validate the calibrated mass flow leak test.
Are you interested in learning more about calibrated mass flow testing?
Our application engineers are standing by to answer your questions.
Contact CTS
To Discuss Your Leak Detection System Requirements
Contact CTS
Contact Cincinnati Test Systems to learn more about our leak detection equipment
Contact UsCustomer Login
An account is needed to view restricted documents such as user manuals and to submit RFQ requests.
Sign In